由于德业除湿机比较小众,homeassistant官方和社区也没有现成的集成可用,要接入homeassistant只能自己来研究一下交互协议了。因为物联设备可能由于功耗和功能考虑,不需要运行linux系统,可能是一些类似MiCO的物联操作系统,内部的控制一般分为两种,一种是直接通过接口(http或tcp),安全性和可维护性上可能需要较多的额外工作量;一种是基于mqtt的控制,这种比较简单,设备中只需要处理和mqtt进行交互,控制逻辑完全解耦,设备上只需要进行数据协议解析和处理,可维护性好,但是mqtt对应的认证信息获取到后,在任何设备上都可以进行控制。德业就是用的后者。
1. 接口获取
想要获取接口,一个是去官网查询是否有开放平台,是否有和其他设备联动的开放接口文档说明,结果意料之中,没有。
有没有其他人搞过类似设备的联动接入,github搜索了一圈,结果意料之中,没有。
自己动手,丰衣足食。开搞。
APK反编译。
反编译使用的工具:
- apktool:资源文件获取,可以提取出图片文件和布局文件进行使用查看(本次不需要,我们只需要api)
- dex2jar:apk反编译成java源码。生成jar文件。
- jd-gui或luyten:查看jar文件中的源码文件。jd-gui有些源码只能显示成bytecode,解析不完整,后面更换了luyten。
具体的反编译过程也比较简单,这里省略。
最终使用luyten打开生成的jar文件。
在io.fogcloud.sdk.fog.helper.Configuration.class中找到了API地址和接口。
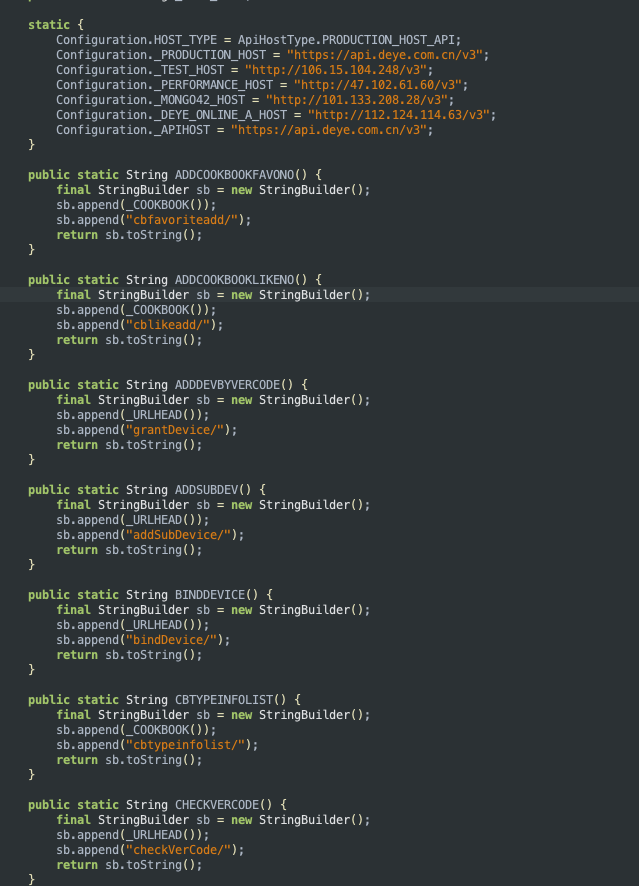
好奇的打开了https地址,赫然的几个大字”Hello World“,这系统感觉是外包给学生做的。
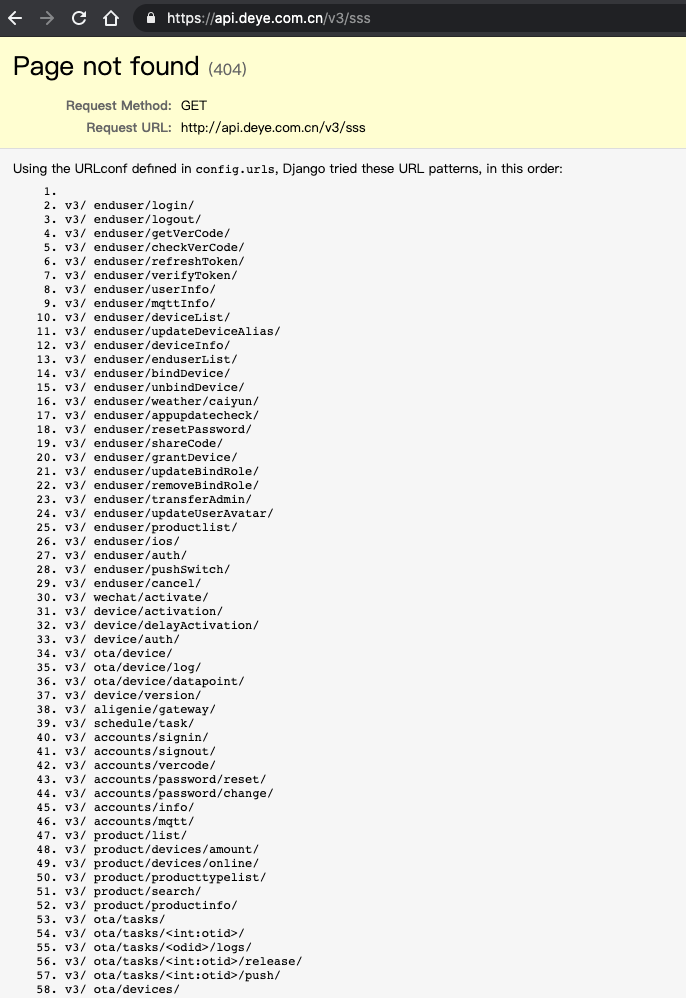
又随便输入了url后缀,好嘛,接口都给列出来了,这下更省事了。
登陆
接下来要做的是从登陆认证接口开始查看,并模拟登陆过程。
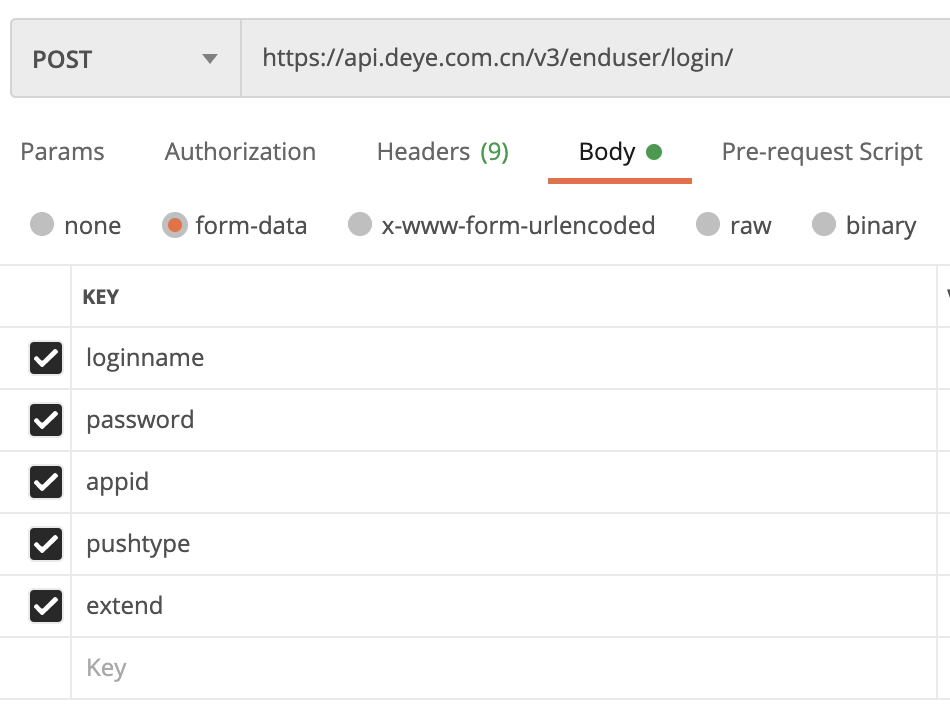
通过源码中的逻辑,可以看到登陆的url和参数,填入对应的参数后登陆,OK。
其中pushtype和extend字段按下面方式填写即可。

{
    "meta": {
        "code": 0,
        "message": "signup ok."
    },
    "data": {
        "token": "eyJSSSSSSDDDDDDDDDDDDCZZZZZZZZZZQyYWM0ODAwMDSFDASDkiLCJhcHBsdwpZCI6ImE3NzQzMTBlLWE0MzAtMTFlNy05ZDRjLTAwMTYzZTBjMWIyMSIsImV4dGVuZCI6eyJjaWQiOiIxMTExMTExMjIyMjMzMzxxMiLCJ0eXBlIjoiMCIsInB1c2h0eXBlIjoiQWxpIn0swNTUyODY2NX0.11atoJf6zwyjd9t2oWvGGdiSCNRSSSSSSSSSSSSFnUG8",
        "clientid": "45abed2ec8de11eaa06c022134asfadas523123"
    }
}
返回的是认证token和clientid。
后续的http接口使用该token进行认证即可。
获取设备列表

结果返回:
{
    "meta": {
        "code": 0,
        "message": "device list by user."
    },
    "data": [
        {
            "online": true,
            "product_icon": "https://deye-cloud.oss-cn-shanghai.aliyuncs.com/profile/1597889707825.png",
            "product_id": "xxxxxxxxxxxxxxxxxxxxxx",
            "product_name": "DYD-E12A3",
            "device_id": "xxxxxxxxxxxxx",
            "mac": "xxxxxxxxxxx",
            "role": 1,
            "gatewaytype": 0,
            "device_name": "DYD-E12A3"
        }
    ]
}
上面的信息中的product_id、device_id记好,后面会用到。
设备控制
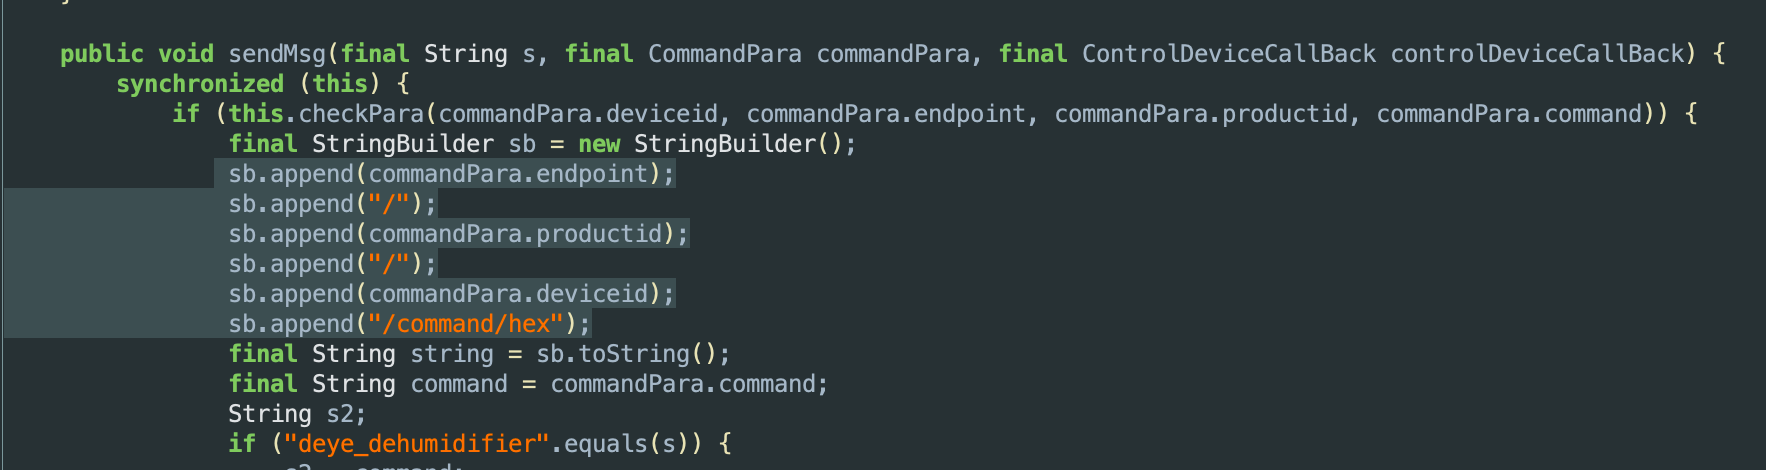
上面是访问服务端接口获取一些基本信息,控制设备并没有相关的api接口。看了下源码中的对应的按钮绑定的事件,找到对应的命令发送接口调用。
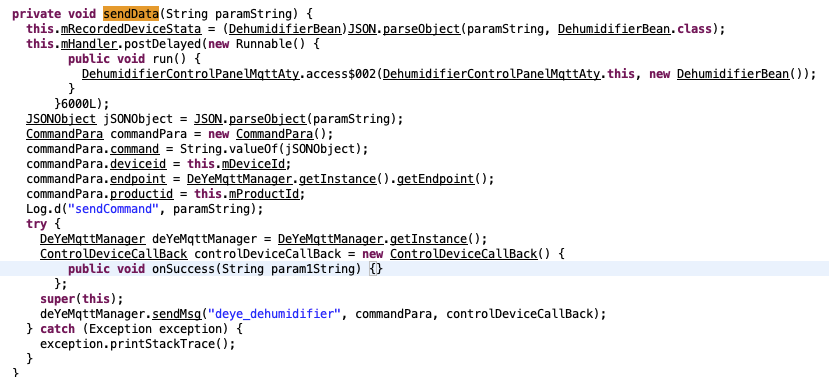
可以看到,命令是通过mqtt来发送的。
mqtt的信息是在服务端接口请求来的。
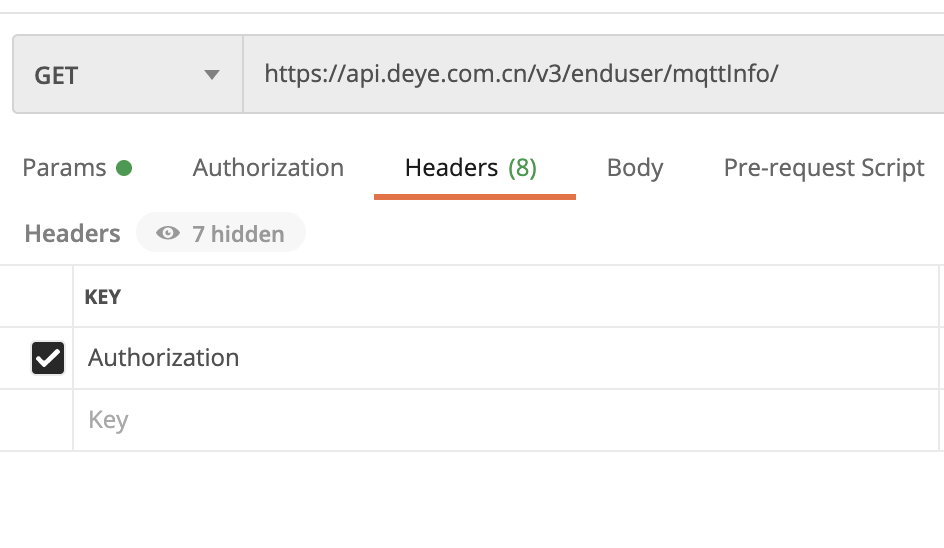
mqtt信息返回:
{
    "meta": {
        "code": 0,
        "message": "mqtt info"
    },
    "data": {
        "loginname": "xxxxxxxxxx/xxxxxxxxxxxxxxx",
        "clientid": "xxxxxxxxxxx",
        "endpoint": "xxxxxxxxxxxxxxxx",
        "password": "xxxxxxxxxx",
        "mqtthost": "xxxxxxxxxxxxxxxxxxx.mqtt.iot.gz.baidubce.com",
        "mqttport": 1883,
        "sslport": 1884
    }
}
设备开启/关闭命令格式
在sendMsg中可以看到具体命令发送的topic和具体的数据。发送的数据采用的是二进制格式,格式转换也比较简单,先把对应的控制属性转换成控制位,并且对控制位采用了ascii编码的字节。
最终生成的是8字节的二进制数据。
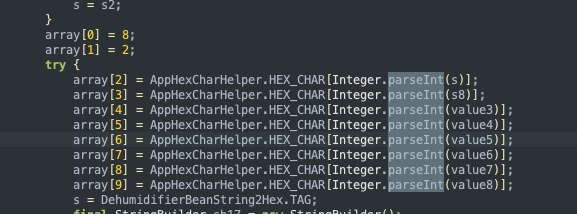
下面按格式模拟生成数据。
payload = struct.pack('10b', 8,2,1,0,30,0,0,0,0,0) // 开启开关控制数据
payload = struct.pack('10b', 8,2,0,0,30,0,0,0,0,0) // 关闭开关控制数据
2. 集成到homeassistant
homeassistant对于mqtt的设备已经支持,只是目前的mqtt设备发送的控制payload无法通过yaml配置二进制数据,只能进行二次开发。
德业TA22型号除湿机可以参考issue, https://github.com/yongman/homeassistant-components/issues/2 可以不用修改mqtt组件源码。
1.复制components中的mqtt模块到custom_components,系统启动时会优先在custom_components中加载mqtt模块,覆盖系统自带的mqtt集成模块。
2.需要增加对deye设备二进制数据的支持,在mqtt的switch.py设备实现中修改开关设备的适配。
   async def async_turn_on(self, **kwargs):
        """Turn the device on.
        This method is a coroutine.
        """
        _LOGGER.debug("payload_on data is %s, type: %s", self._config[CONF_PAYLOAD_ON],type(self._config[CONF_PAYLOAD_ON]))
        import struct
        payload = self._config[CONF_PAYLOAD_ON]
        if (payload == "deye_on"):
            payload = struct.pack('10b', 8,2,1,0,30,0,0,0,0,0)
        mqtt.async_publish(
            self.hass,
            self._config[CONF_COMMAND_TOPIC],
            payload,
            self._config[CONF_QOS],
            self._config[CONF_RETAIN],
        )
        if self._optimistic:
            # Optimistically assume that switch has changed state.
            self._state = True
            self.async_write_ha_state()

    async def async_turn_off(self, **kwargs):
        """Turn the device off.

        This method is a coroutine.
        """
        _LOGGER.debug("payload_off data is %s, type: %s", self._config[CONF_PAYLOAD_OFF], type(self._config[CONF_PAYLOAD_OFF]))
        payload = self._config[CONF_PAYLOAD_OFF]
        import struct
        if (payload == "deye_off"):
            payload = struct.pack('10b', 8,2,0,0,30,0,0,0,0,0)
        mqtt.async_publish(
            self.hass,
            self._config[CONF_COMMAND_TOPIC],
            payload,
            self._config[CONF_QOS],
            self._config[CONF_RETAIN],
        )
        if self._optimistic:
            # Optimistically assume that switch has changed state.
            self._state = False
            self.async_write_ha_state()
3.修改状态监听回调函数,正确监听开关的真实状态。
        @callback
        @log_messages(self.hass, self.entity_id)
        def state_message_received(msg):
            """Handle new MQTT state messages."""
            payload = msg.payload
            if (self._config[CONF_NAME].startswith('deye')):
                import json
                data = json.loads(payload)['data'][4:6]
                _LOGGER.debug("receive payload data is %s, switch data %s", json.loads(payload)['data'], data)
                if (data == '00'):
                    self._state = False
                elif (data == '81'):
                    self._state = True
            else:
                if template is not None:
                    payload = template.async_render_with_possible_json_value(payload)
                if payload == self._state_on:
                    self._state = True
                elif payload == self._state_off:
                    self._state = False

            self.async_write_ha_state()
4.增加配置,修改configuration.yaml
增加mqtt配置。
mqtt:
  broker: xxxxxxxxxxxxxxxx.mqtt.iot.gz.baidubce.com
  port: 1883
  client_id: xxxxxxxxxxxxxxxxxxxxx
  username: !secret mqtt_username
  password: !secret mqtt_password
增加switch配置,其中topic的名称就是mqttinfo中的mqtt_endpoint/productid/deviceid/status/hex和mqtt_endpoint/productid/deviceid/command/hex。
switch:
  - platform: mqtt
    name: deye
    state_topic: xxxxxxxxx/xxxxxxxxxxxxx/xxxxxxxxxxxxxxxx/status/hex
    command_topic: xxxxxxxxx/xxxxxxxxxxxxx/xxxxxxxxxxxxxxxx/command/hex
    payload_on: deye_on
    payload_off: deye_off
5.重启HA
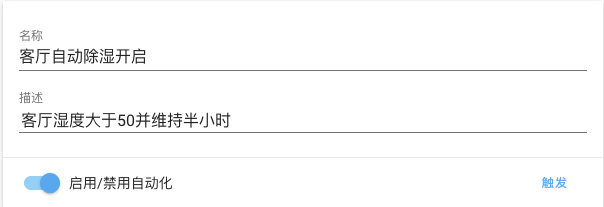
6.增加自动化
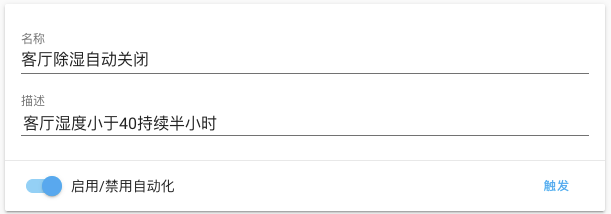
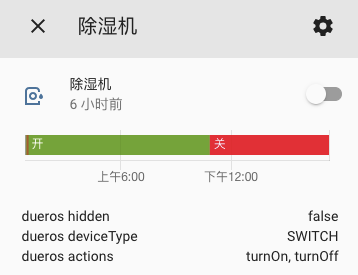
3. 搞定
更新
更新homeassistant到2021.3.4版本后mqtt不兼容,需要从2021.3.4版本mqtt中进行二次更改,由于mqtt publish服务的参数类型变化,原来的二进制payload方式失效,将该部分逻辑从switch.py转移到__init__.py中,具体可以看已经修改过的mqtt代码。
https://github.com/yongman/homeassistant-components/tree/master/mqtt